Commercial Espresso Grinder Burr Replacement & Precision Alignment Guide
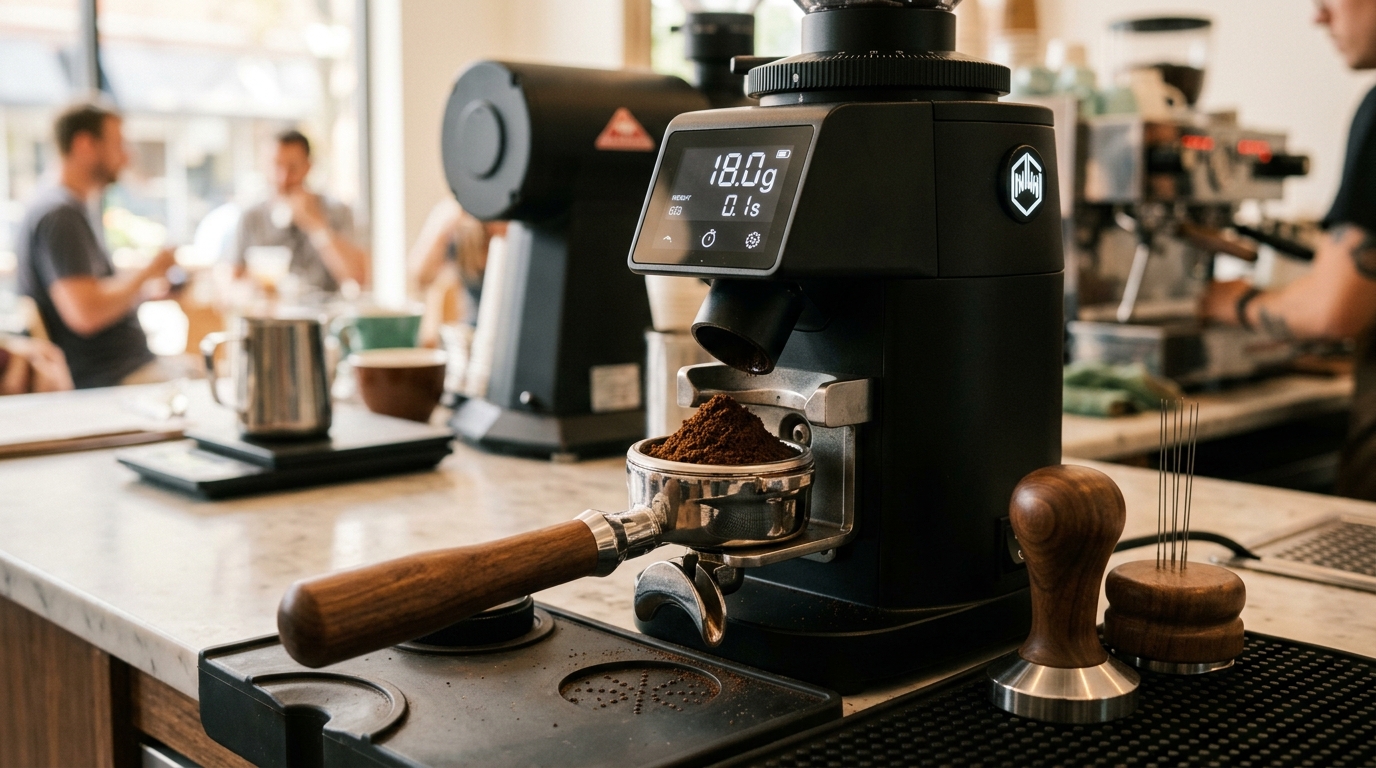
In a high-volume commercial specialty coffee shop, your espresso grinder’s burr set is the single most critical mechanical interface between raw coffee bean inventory and liquid revenue. While espresso machines control water temperature and hydraulic pressure, the grinder controls the total surface area available for extraction. Even a top-tier $28,000 multi-boiler espresso machine cannot compensate for coffee ground through rounded, dull, or mechanically misaligned burrs.
Yet, despite its paramount importance, burr maintenance is the most frequently neglected operational discipline in commercial coffee service. Grinder burrs do not fail catastrophically with a loud mechanical bang or an electronic fault code. Instead, they die a slow, insidious death over hundreds of operating hours. As cutting edges wear down at the microscopic level, baristas unconsciously compensate by grinding finer, overdosing baskets, increasing water temperatures, and dumping thousands of dollars of channeling espresso down the drain pan.
This engineering guide provides cafe owners, head roasters, and technical operators with the technical metrics, wear physics, replacement protocols, and precision alignment methodologies required to maintain commercial grinder performance at tournament-grade tolerances.
1. The Physics of Burr Degradation: Micro-Fines & Heat
To understand when and why grinder burrs must be replaced, one must understand how a burr set fractures a roasted coffee bean. A commercial burr does not “crush” coffee; it cuts and shatters brittle roasted bean cells through progressive shear stress.
+-------------------------------------------------------------------------+
|                  FLAT BURR TOOTH ANATOMY & WEAR ZONES                   |
+-------------------------------------------------------------------------+
|                                                                         |
|        [INLET / PRE-BREAKER TEETH]              [FINISHING FLATS]       |
|          Coarse shatter zone                     Micro-particle sizing  |
|                                                                         |
|        \                                      _ _ _ _ _ _ _ _ _ _       |
|         \                                    /                   \      |
|          \__________                        /    LAND / FINISH    \     |
|                     \                      /     CUTTING FLAT      \    |
|                      \____________________/                         \   |
|                                                                         |
|  [NEW BURR]: Razor-sharp 90° transitions | Consistent shear stress      |
|  [WORN BURR]: Radiused 15-30µm edges    | Compressive crushing & heat  |
|                                                                         |
+-------------------------------------------------------------------------+
The Three Stages of Commercial Burr Wear
-
Stage 1: Pre-Breaker Wear (The Inner Grooves) The innermost deep teeth fracture whole coffee beans into 2mm to 4mm fragments. When these inner teeth lose their sharp cutting edges, beans are no longer sheared cleanly; instead, they bounce and fracture erratically. This manifests as “popcorning” in the hopper throat and erratic grinding speed, increasing shot-dosing times on timed grinders by 1.5 to 3.0 seconds per double basket.
-
Stage 2: Finishing Land Wear (The Outer Perimeter) The outer flat perimeter (“the lands”) establishes final particle sizing and distribution. Fresh burrs feature microscopic edge radii under 5 microns. As thousands of pounds of coffee frictionally scour these surfaces, the sharp cutting corners round off to radii exceeding 25 to 40 microns. Rather than cutting coffee brittle fragments at high velocity, worn lands compress and smear cellular walls against one another.
-
Stage 3: The Bimodality Explosion & Micro-Fines Migration The consequence of dull lands is catastrophic particle distribution divergence:
- Boulders: Larger coarse shards that pass through without complete shearing.
- Dust / Micro-Fines (<50 microns): Pulverized cellular debris created when dull steel rubs against bean cellulose under high normal force.
These micro-fines migrate downward during extraction, creating a dense, impermeable silt layer against the lower perforations of the portafilter basket. Simultaneously, the large boulders create low-resistance void channels. The barista experiences a shot that starts dripping painfully slow, chokes for 12 seconds, suddenly blows out into rapid spurting channeling, and yields a dry puck that appears wet, muddy, and cracked.
Thermal Runaway
Dull burrs require significantly more mechanical friction to fracture coffee. This frictional energy dissipates directly into the coffee grinds and burr carriers:
- Optimal Grounds Exit Temperature: 85°F to 100°F (29°C to 38°C).
- Worn Burr Exit Temperature: 115°F to 135°F (46°C to 57°C).
Grinding coffee above 115°F instantly volatilizes delicate aromatics (terpenes, aldehydes, and volatile esters), baking out enzymatic acidity and fruit notes before water ever touches the puck. In high-volume morning rushes, this thermal buildup expands the aluminum burr carrier, causing grind size drift that forces baristas into continuous, frantic dial-in adjustments.
2. Burr Lifespan Benchmarks: Manufacturer Specs vs Real-World Specialty Thresholds
Grinder manufacturers publish burr replacement intervals measured in total pounds (or kilograms) of coffee throughput. However, commercial operators must understand the massive discrepancy between commercial commodity thresholds (when the burrs physically refuse to grind fine enough for dark roast espresso) and specialty coffee extraction thresholds (when unimodal distribution degrades enough to cause noticeable flavor suppression).
Commercial Burr Specifications Table
| Grinder Model | Burr Geometry | Burr Diameter | Base Material & Coating | Manufacturer Spec (lbs / kg) | Specialty Coffee Cutoff (lbs / kg) | Approx. Replacement Cost (USD) |
|---|---|---|---|---|---|---|
| Mahlkönig E65S / E65S GBW | Flat | 65mm | Special Hardened Steel | 1,760 lbs (800 kg) | 1,200 lbs (550 kg) | $175 - $210 |
| Mahlkönig E80 Supreme | Flat | 80mm | Special Hardened Steel | 3,300 lbs (1,500 kg) | 2,200 lbs (1,000 kg) | $295 - $340 |
| Mahlkönig EK43 / EK43 S | Flat (Vertical) | 98mm | Cast Tool Steel (Coffee/Turkish) | 13,200 lbs (6,000 kg) | 4,000 lbs (1,800 kg) | $420 - $580 |
| Nuova Simonelli Mythos One / 2 | Flat (45° Angle) | 75mm | Titanium Nitride (TiN) | 2,640 lbs (1,200 kg) | 2,000 lbs (900 kg) | $260 - $310 |
| Mazzer Super Jolly V Pro | Flat | 64mm | Standard Carbon Steel | 660 lbs (300 kg) | 500 lbs (225 kg) | $75 - $95 |
| Mazzer Major V | Flat | 83mm | Special Hardened Steel | 1,320 lbs (600 kg) | 900 lbs (400 kg) | $140 - $180 |
| Mazzer Robur S | Conical | 71mm Outer | Tool Steel | 1,760 lbs (800 kg) | 1,300 lbs (600 kg) | $190 - $240 |
| Compak E8 / E10 Master | Flat / Conical | 83mm / 68mm | Red Speed (Titanium / DLC) | 4,400 lbs (2,000 kg) | 3,000 lbs (1,350 kg) | $280 - $350 |
Data verified against OEM engineering service bulletins and Mahlkönig/Mazzer North American distribution technical manuals.
3. Flat Burrs vs Conical Burrs: Wear Profiles & Physical Dynamics
Commercial espresso grinders utilize either flat or conical burr sets. The mechanical wear profiles and operational lifespans of these two geometries differ substantially.
       FLAT BURR GEOMETRY                    CONICAL BURR GEOMETRY

   Upper Fixed Ring                          Inner Male Cone
  +------------------+                              / \
  |  \\\\\\\\\\\\\\  |                             /   \
  +------------------+                            / \\  \
  |  //////////////  |                           /  \\\  \
  +------------------+                          /_________\
   Lower Rotating Ring                       Outer Female Ring

  - Parallel cutting gap                    - Progressive vertical taper
  - High RPM: 1,400 - 1,750 RPM             - Low RPM: 450 - 500 RPM
  - Centrifugal particle exit               - Gravity + centrifugal exit
  - Highly unimodal distribution            - Bimodal particle distribution
Flat Burr Wear Dynamics
- Centrifugal Velocity: Flat burrs rely on rotational velocity (typically 1,400 to 1,750 RPM on 60Hz North American power grids) to force beans centrifugally outward across horizontal cutting grooves.
- Wear Pattern: Wear occurs predominantly on the outermost 3mm to 5mm perimeter lands. Because both burrs are circular discs held parallel, any axial wobble or bearing play unevenly scours one side of the disc, causing premature asymmetric dulling.
- Flavor Vulnerability: Specialty cafes favor flat burrs for their high unimodal distribution (clean, articulate flavor separation and high extraction yield). Consequently, flat burrs show flavor degradation much sooner than conical burrs; when the finishing lands round off, flavor clarity collapses into flat bitterness.
Conical Burr Wear Dynamics
- Low-RPM Planetary Gearing: Conical grinders utilize a central male cone revolving inside a stationary female outer ring. To generate sufficient torque without scorching beans, conical grinders use internal gear reducers operating at 450 to 500 RPM.
- Massive Surface Area: A 71mm or 83mm conical burr set features over 2.5 times the active cutting surface area of a 64mm flat burr set. The lower RPM means each bean passes through the cutting teeth with substantially less frictional heat.
- Inherent Bimodality: Conical burrs naturally generate a bimodal particle distribution (one peak of fines and one peak of coarse particles). Because the extraction profile already relies on fines to create flow resistance in the basket, conical burrs are far more forgiving of microscopic wear. A cafe can often run conical burrs 30% longer than flat burrs before customers notice a degradation in milk beverage quality.
4. Advanced Burr Metallurgy & Specialty Coatings
When replacing commercial burrs, operators can choose between standard OEM steel and aftermarket coated geometries (such as SSP Precision Grinding burrs, Gorilla Gear, or OEM TiN upgrades). Understanding coating chemistry determines whether an upgrade delivers a positive return on investment.
+-------------------------------------------------------------------------------+
|                      BURR COATING COMPARISON & PROPERTIES                     |
+-------------------------------------------------------------------------------+
| Coating Type       | Surface Hardness | Coeff. of Friction | Lifespan Multiplier |
|--------------------+------------------+--------------------+-------------------|
| Standard Tool Steel| 58 - 62 HRC      | 0.65 - 0.75        | 1.0x (Baseline)   |
| Hardened 154CM     | 62 - 64 HRC      | 0.55 - 0.60        | 1.5x - 1.8x       |
| Titanium (TiN)     | ~2,300 - 2,500 HV| 0.35 - 0.40        | 3.0x - 4.0x       |
| Red Speed (TiAlN)  | ~3,000 - 3,300 HV| 0.30 - 0.35        | 4.0x - 5.0x       |
| DLC (Diamond-Like) | ~4,500 - 5,000 HV| 0.10 - 0.15        | 5.0x - 7.0x       |
+-------------------------------------------------------------------------------+
1. Standard High-Carbon Tool Steel (OEM Baseline)
Standard steel burrs are machined from drop-forged carbon or tool steel and heat-treated to 58–62 on the Rockwell C scale (HRC). They provide exceptional initial sharpness at low manufacturing cost ($60–$120 per set). However, raw steel is susceptible to atmospheric oxidation and acid corrosion from unroasted coffee oils. Furthermore, standard steel requires an initial “seasoning” period of 10 to 25 pounds of coffee before particle distribution stabilizes.
2. Titanium Nitride (TiN / Gold Coating)
Physical Vapor Deposition (PVD) applies a microscopic 2–4 micron ceramic layer of Titanium Nitride. Surface hardness jumps to over 2,300 Vickers (equivalent to >80 HRC).
- Thermal Dissipation: TiN has a significantly lower coefficient of friction than raw steel, shedding heat faster and reducing grounds exit temperatures by 8°F to 14°F during high-volume rushes.
- Specialty Economics: For high-volume cafes pushing 40 to 60 lbs of espresso per week, TiN burrs (like those in the Mythos One) eliminate annual burr changes, extending service intervals to once every 18 to 24 months.
3. Titanium Aluminum Nitride (TiAlN / “Red Speed”)
Red Speed coatings incorporate aluminum into the PVD matrix. When subjected to frictional heat, the aluminum forms a microscopic surface layer of aluminum oxide, which acts as a thermal barrier protecting the underlying steel matrix. Red Speed coatings resist wear up to 1,400°F (760°C) and extend burr life up to 5,000 lbs. They are the premier choice for busy drive-thrus and metro specialty cafes operating without on-site service technicians.
4. Diamond-Like Carbon (DLC)
DLC utilizes plasma-assisted chemical vapor deposition to deposit amorphous carbon featuring high sp3 diamond tetrahedral bonds. DLC provides the lowest coefficient of friction (0.12) of any industrial cutting surface. Coffee grinds do not adhere to DLC surfaces, dramatically reducing static cling, retention inside the grinding chamber, and daily chute accumulation.
5. Step-by-Step Burr Replacement SOP
Replacing commercial grinder burrs requires precision mechanical discipline. Rushing the process or cross-threading a brass carrier will turn a routine $150 maintenance task into a $1,200 motor-block replacement.
+-------------------------------------------------------------------------+
|                  BURR REPLACEMENT WORKFLOW CHECKLIST                    |
+-------------------------------------------------------------------------+
| [ ] 1. Electrical Lockout & Bean Evacuation                             |
| [ ] 2. Collar Pitch Disassembly & Index Marking                         |
| [ ] 3. Manual Screw Removal (No Impact Drivers)                         |
| [ ] 4. Carrier Mating Surface Decontamination                           |
| [ ] 5. Burr Seating & Star-Pattern Torque Balancing                     |
| [ ] 6. Zero-Point Calibration & Break-In Seasoning                      |
+-------------------------------------------------------------------------+
Required Tool Inventory
- Hand screwdrivers: Correct-fitting JIS or flat-head drivers (never use an undersized driver that cams out and strips brass screw heads).
- Brass wire brush (never use steel brushes on aluminum or brass carriers).
- High-suction HEPA shop vacuum with micro-crevice nozzle.
- Food-grade isopropyl alcohol (99%) or Cafiza solution for cleaning.
- Digital torque screwdriver (recommended for high-end grinders: set between 1.5 to 2.2 Nm).
- Non-permanent blue threadlocker (use strictly if specified by OEM, e.g., Mazzer).
Step 1: Electrical Lockout & Hopper Evacuation
Unplug the grinder from its 120V/220V wall outlet. Close the hopper slide gate, remove the hopper, and vacuum all loose whole beans from the throat. Run the motor for 2 seconds before unplugging to ensure the grinding chamber is clear.
Step 2: Thread Disassembly & Index Marking
For threaded-collar grinders (Mazzer, Eureka, Compak):
- Mark the current grind adjustment setting with a piece of tape or grease pencil.
- Rotate the adjustment collar counterclockwise until the upper burr carrier completely threads out of the motor block.
- Critical Caution: Pay meticulous attention to the collar threads. These threads are finely machined aluminum or brass. If dropped, bumped, or cross-threaded, the carrier is permanently ruined. Inspect the pitch for stripped threads or hardened coffee oil buildup.
Step 3: Removing Burr Screws (Preventing Stripped Fasteners)
Commercial burrs are secured by two or three flat-head countersunk screws. Over thousands of hours, baked coffee oils act like permanent thread glue:
- Thoroughly pick out all compressed coffee cake from the screw drive slots using an awl or dental pick before inserting the driver.
- Press downward with 80% of your body weight and apply 20% turning torque. Camming out and rounding a burr screw will require precision screw extractors or drilling.
- Pro Tip: If a screw is seized, place a brass drift or heavy flat punch directly on the screw head and deliver one sharp, solid tap with a small 8oz hammer. The acoustic shockwave breaks the micro-friction bond of the baked coffee oils without damaging the motor bearings.
Step 4: Carrier Mating Surface Decontamination
Once old burrs are removed, examine the machined recess in the carrier. Even a single particle of stray coffee chaff (measuring 30 microns thick) trapped under the bottom face of a new burr will cock the burr at an angle, destroying grind parallelism.
- Scrub the carrier bed with a brass wire brush and 99% isopropyl alcohol until raw bare metal shines.
- Wipe dry with a lint-free microfiber towel.
- Vacuum the entire recess to ensure zero airborne particles remain.
Step 5: Installing New Burrs & Star-Pattern Torque Balancing
- Seat the new burr into the carrier recess. Rotate it by hand to verify it drops fully flat without binding.
- Thread all three screws in by hand until they make light contact with the burr chamfer.
- Tighten the screws incrementally using a star/alternating pattern (12 o’clock, 4 o’clock, 8 o’clock) rather than tightening one screw fully:
- Pass 1: Finger tight (0.5 Nm).
- Pass 2: Snug (1.2 Nm).
- Pass 3: Final torque (1.8 to 2.0 Nm).
- This uniform torque distribution prevents localized warping of the circular burr disc.
6. Precision Burr Alignment: The Marker Test & Shimming Protocol
Straight from the factory, even high-end commercial grinders exhibit carrier runout (axial misalignment) of 20 to 60 microns due to machining tolerances, spring carrier canting, and thread play. Precision alignment eliminates this runout, locking the burrs into perfect parallel alignment down to sub-10 micron tolerances.
+-------------------------------------------------------------------------+
|                  DRY-ERASE MARKER ALIGNMENT TEST RESULTS                |
+-------------------------------------------------------------------------+
|                                                                         |
|         MISALIGNED BURR                         PERFECTLY ALIGNED       |
|    (Single Point Rubbing)                     (360° Uniform Contact)    |
|                                                                         |
|              Clean                                     Clean            |
|             Wiped Off                                Wiped Off          |
|            .--------.                               .--------.          |
|           /  ======  \                             /  ======  \         |
|          |  /      \  |                           |  /      \  |        |
|  Marker  | |        | | Marker             Clean  | |        | | Clean  |
|  Intact  |  \      /  | Intact             Wiped  |  \      /  | Wiped  |
|           \  ======  /                             \  ======  /         |
|            '--------'                               '--------'          |
|              Marker                                    Clean            |
|              Intact                                  Wiped Off          |
|                                                                         |
|   Only 25% contact: Bimodal disaster       100% contact: Tight unimodal |
|   Action: Shim low quadrant (bottom)       Action: Lock setting & brew  |
+-------------------------------------------------------------------------+
The Dry-Erase Wipe Test Methodology
-
Mark the Finishing Lands: Take a standard black or blue dry-erase whiteboard marker. Draw a solid, continuous band of ink around the outermost 2mm flat perimeter of both the upper (stationary) and lower (rotating) burrs. Ensure the ink coats the flat wiping surface entirely. Allow the ink to dry for 60 seconds.
-
Reassemble to Point of Contact: Reinstall the carrier and slowly adjust the grind collar towards the fine setting. If operating an EK43 or Mythos, adjust while turning the motor shaft manually or spinning the motor on/off for a split fraction of a second.
-
Listen for Chirp: Stop adjusting the exact millisecond you hear the very faintest metallic “chirp-chirp” sound. This indicates the highest microscopic point of the rotating burr is making light contact with the highest microscopic point of the stationary burr. Let it chirp for 1 to 2 seconds, then immediately back off the adjustment 2 full notches coarser.
-
Disassemble & Inspect Marker Clearance: Carefully unthread the carrier and inspect the ink band:
- Scenario A (Aligned - >80% Wipe): The marker ink is cleanly scrubbed away uniformly across the entire 360° perimeter of both burrs. Your burrs are parallel. No shimming required.
- Scenario B (Misaligned - Localized Wipe): The marker is scrubbed clean on only a 60° to 90° arc (one side), while the remaining 270° of marker remains completely untouched. This proves your burr carrier is tilted; when grinding espresso, the gap on one side is 30 to 50 microns wider than the other!
The Precision Shimming Procedure
+-------------------------------------------------------------------------+
|               BURR SHIM PLACEMENT MATRIX (UNDER CARRIER)                |
+-------------------------------------------------------------------------+
|                                                                         |
|                          [TOP SCREW]                                    |
|                                                                         |
|                       /---------------\                                 |
|                      /                 \                                |
|                     /     CARRIER       \                               |
|                    |       BODY          |                              |
|                     \                   /                               |
|                      \                 /                                |
|                       \---------------/                                 |
|                                                                         |
|              [SHIM 1]                  [SHIM 2]                         |
|         Single layer foil         Double layer foil                     |
|         (15µm lift)               (30µm lift)                           |
|                                                                         |
|    Place foil under the burr face OPPOSITE the marker wipe zone         |
|    to elevate the low quadrant into parallel alignment.                |
+-------------------------------------------------------------------------+- Identify the Low Zone: The low zone is the quadrant where the marker ink remained 100% intact. That side of the burr sits too deep in the carrier recess.
- Cut Precision Shims: Cut small rectangular strips of standard heavy-duty aluminum kitchen foil (approx. 5mm x 12mm). Standard household aluminum foil measures approximately 15 to 18 microns (0.015mm) thick.
- Insert Under the Low Quadrant: Remove the burr screws on the low side, lift the burr slightly, and place one layer of aluminum foil flat between the back face of the burr and the machined floor of the carrier, positioned directly between screw holes.
- Re-Torque & Retest: Re-tighten the burr screws in star pattern. Clean the burrs, reapply the dry-erase marker, reassemble, and perform the chirp test again.
- Iterate: If the wipe pattern increases from 25% to 70%, add a second layer of foil or a half-strip. Continue until both burrs achieve >85% continuous 360° contact.
7. Financial ROI: The Economic Cost of Worn & Misaligned Burrs
Many cafe owners view burr replacement as an annoying $250 equipment expense to postpone as long as possible. A rigorous mass-balance audit of cafe waste reveals that dull, misaligned burrs cost an average specialty cafe between $3,200 and $6,800 annually in wasted coffee, lost barista labor, and customer churn.
Cafe Mass-Balance Waste Model
Assumptions: Medium-volume specialty cafe pulling 60 lbs of espresso per week (approx. 1,400 double shots weekly) paying $14.00/lb wholesale for roasted coffee.
+-------------------------------------------------------------------------------+
|             ANNUAL FINANCIAL LOSS FROM DULL & MISALIGNED BURRS                |
+-------------------------------------------------------------------------------+
| Waste Vector                    | Impact on Operation     | Annual Cost (USD) |
|---------------------------------+-------------------------+-------------------|
| Daily Dial-In Purges            | 4 extra dial-ins/day    | \$1,274.00        |
| Channeling Gushers & Sink Shots | 3.5% of total volume    | \$1,528.80        |
| Overdosing to Compensate        | +0.8g per basket        | \$1,747.20        |
| Extraction Yield Deficit (TDS)  | 17.5% EY vs 20.5% EY    | Taste Degradation |
| Barista Frustration / Labor     | 15 min lost labor/shift | \$1,368.75        |
|---------------------------------+-------------------------+-------------------|
| TOTAL ESTIMATED ANNUAL LOSS     |                         | \$5,918.75 / yr   |
+-------------------------------------------------------------------------------+
Explaining the Waste Vectors
-
The Overdosing Trap (+0.8g per basket): When burrs are dull and misaligned, shots taste hollow, sour, and astringent at standard 1:2 brew ratios (e.g., 18g in, 36g out). To mask this under-extraction and impart body to lattes, baristas instinctively up-dose baskets to 18.8g or 19.0g without adjusting recipe yields. Over a year of 72,000 double shots, that extra 0.8g represents 127 pounds of wasted roasted coffee—costing $1,747 in raw beans.
-
Sink Shots During Service Spikes (3.5% Gusher Rate): Channeling caused by micro-fines migration creates unpredictable high-speed shots that finish in 16 seconds instead of 28 seconds. In a busy cafe, baristas dump these unservable shots into the knockbox. A modest 3.5% sink-shot rate wastes 50 double shots per week ($1,528 per year).
-
Comparing Replacement Cost vs Waste: Installing a brand-new set of OEM Mahlkönig or Mazzer burrs costs approximately $180 to $290 and requires 45 minutes of technician labor. The payback period on new burrs in a 60 lb/week cafe is less than 21 operating days.
8. Preventive Maintenance Log & Tracking SOP
To eliminate guesswork, every cafe should implement a strict physical and digital grinder tracking protocol.
+-------------------------------------------------------------------------+
|                 COMMERCIAL GRINDER MAINTENANCE CARD                     |
|                (Affix with Mylar sleeve to grinder base)                |
+-------------------------------------------------------------------------+
| Grinder ID: ESP-01 (Mahlkönig E65S GBW)                                 |
| Burr Type: OEM 65mm Special Steel | Target Threshold: 1,400 lbs         |
| Installation Date: Oct 15, 2025   | Baseline Setting: Notch 3.2         |
+-------------------+--------------------+---------------+----------------+
| Date              | Cumulative Lbs     | Marker Test % | Tech Initials  |
+-------------------+--------------------+---------------+----------------+
| 2025-10-15        | 0 lbs (New burrs)  | 92% (Shimmed) | MV             |
| 2025-12-01        | 360 lbs            | -             | SK (Cleaned)   |
| 2026-01-15        | 780 lbs            | 88%           | MV (Inspected) |
| 2026-03-01        | 1,220 lbs          | 65% (Dulling) | MV             |
| 2026-03-20        | 1,380 lbs (REPLACE)| -             | Scheduled      |
+-------------------+--------------------+---------------+----------------+
Recommended Maintenance Schedule
- Daily: Vacuum grinder throat and chute; wipe hopper with food-safe dry cloth (never wash acrylic hoppers in high-temp dishwashers).
- Weekly: Run 35g of organic grain-based grinder cleaning tablets (such as Urnex Cafiza Grinder Clean or Biocaf) through burrs at medium grind to absorb rancid coffee oils from cutting surfaces.
- Monthly: Remove upper burr carrier, vacuum burr chamber, inspect burr edges with fingernail scratch test, and clean carrier threads.
- Bi-Annually: Perform the dry-erase marker alignment test. Re-shim if carrier settling has dropped contact uniformity below 75%.
- At Lifespan Limit: Replace burr set, install new OEM screws, and re-shim to >85% parallel alignment.
By treating commercial grinder burrs as precision cutting instruments rather than passive metal discs, cafe operators safeguard flavor consistency, stabilize daily recipes, and recapture thousands of dollars in eliminated coffee waste.
Frequently Asked Technical Questions
How do you know when commercial espresso grinder burrs are worn out?
The primary symptoms of worn burrs include: inability to achieve fine enough grind settings without burrs touching (chirping), increased shot times with simultaneous channeling gushers, elevated grounds temperature exceeding 110°F (43°C) out of the chute, a dull muddy appearance in the dry coffee bed, and an increase in daily grind adjustments required to maintain extraction targets.
How long do commercial flat burrs last compared to conical burrs?
Standard tool steel flat burrs (64mm–83mm) typically last between 1,100 to 1,800 lbs (500 to 800 kg) of throughput. Premium coated flat burrs (Titanium Nitride or Red Speed) extend this lifespan to 3,500 to 5,500 lbs (1,600 to 2,500 kg). Conical burr sets (like the Mazzer Robur 71mm or 83mm) rotate at roughly one-third the RPM (450–500 RPM vs 1400–1750 RPM) and feature significantly more cutting surface area, lasting 1,800 to 3,000 lbs (800 to 1,400 kg) in standard steel and up to 6,000 lbs (2,700 kg) when coated.
What is the dry-erase marker test for grinder burr alignment?
The marker test involves coating the outer perimeter cutting flats (the finishing teeth) of both the fixed and rotating burrs with a dry-erase marker. After reassembling the grinder, you slowly run the motor or turn the burrs manually until you hear the very faintest metallic chirp (the burrs making microscopic contact). Upon disassembling the burr set, inspect where the marker was wiped clean. If only 30% of the marker is wiped off, your burrs are misaligned, creating a non-parallel gap that causes extreme particle size bimodality.
Can misaligned grinder burrs cause espresso channeling?
Yes, burr misalignment is the leading hidden cause of chronic espresso channeling in specialty cafes. When burr carriers are out of parallel by even 20 to 50 microns, coffee beans pass through an asymmetrical gap, producing excessive boulder particles on the wide side and catastrophic micro-fines on the pinched side. The micro-fines choke the bottom of the espresso basket while water channels rapidly through the boulders, producing sour, astringent, under-extracted shots with high TDS readings but low extraction yields.
What material should be used to shim commercial grinder burrs?
Always use precision aluminum kitchen foil (roughly 15 to 18 microns thick per layer) or brass shim stock (0.0005 to 0.001 inch / 12 to 25 microns). Never use paper, cardboard, or plastic tape, as these materials compress under burr screw torque, absorb humidity and coffee oils over time, and introduce microbial contamination inside the grinding chamber.